Google Forms can be a complicated tool, but it can also be a super useful one. One of the ways you can take advantage of Google Forms is by using the Quiz mode feature. There’s a lot you can do just with Quiz mode. These 5 tips and tricks will get you started with Google Forms Quiz Mode in your classroom:
1. Set up the Form as a quiz and toggle settings
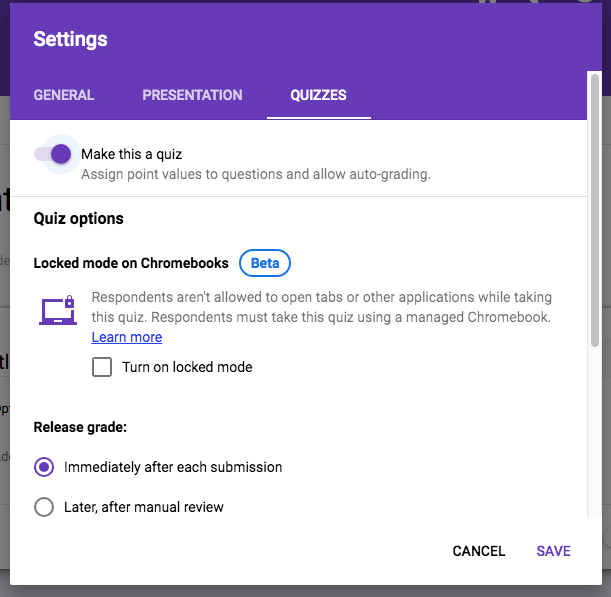
First things first, you’ll need to set up the Form as a quiz. Click on the gear icon to open the settings, and then click over to the Quizzes tab. Toggle the switch that says “Make this a quiz”. You have some other options to work with as well. Turn locked mode on or off (I talk about this later). You can set the grades to release immediately after submissions, or you can release them after manual review (say, you need to score a written response or something). Scores will get emailed to students as soon as you release them. Lastly, you can control what quiz information students can see after they submit: questions they missed, questions they got correct, and point values they received for each question. There are some interesting things you can do with these settings outside of a quiz, but that’s for another post.
2. Utilize Locked mode on quizzes
Google rolled out Locked Mode, which is a cool feature for quizzes and exams. Basically, if you’re using Chromebooks that are managed by your school system, you can lock down the browser for students. When they log onto the Form, Google will prevent students from being able to access any other tabs while they’re taking the quiz. It’s another step in making it difficult for students to cheat.
But what if they just exit out of the quiz and look up information and get back in? Locked Mode will also notify you if a student has opened the quiz multiple times. In the Google Sheet created for the form, you’ll have a note attached to the student’s name that tells you they reopened the quiz. If students know this, it’ll reduce the amount of them that do so.
3. Create an answer key and assign point values

After you make the Form a quiz, you’ll need to populate it with questions (or maybe you already have questions done). I suggest adding places for student names and class periods. I have separate responses for first and last name, just to make it easier to sort. You’ll notice that now, underneath each question, there is an option for answer key. This allows you to set up an answer key and assign point values for each question. Pro tip: Forms defaults every question to have a point value, so unless you want students to get points for entering their name, you’ll need to make sure that change these point values.

Click on Answer Key, and you’ll notice the question box changes. Click on the point value slot to change the point value for each question. Click on the correct answer if it’s multiple choice or checkboxes. Pro tip: you can check as many correct answers as you want for multiple choice, so you may have two potential correct answers for a question, and student can get credit if they answer either correctly.

You can add answers for short answer questions as well. Pro tip: you can add multiple correct answers that would be accepted. So, for a subject like math, you may add the numerical answer as well as the written answer for a question. Spelling can be a potential issue here, so you may want to double check answers for these when students submit. You can check the box to mark any other answers as incorrect, or you can grade it later by doing a manual review.
4. Use response validations to guide students

Response validations are great for guiding students through questions. Essentially, Forms will not record their answer unless they meet the validation requirements. You want to be in the Edit Question part for this. Click on the 3 dots, and select Response Validation. Response validations work for three question types: Checkboxes, Short Answer, Paragraph.
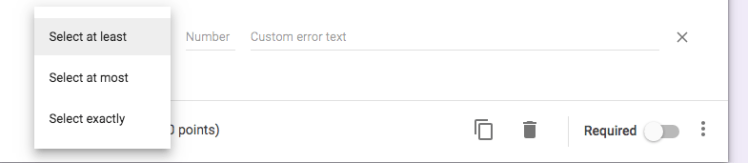
For Checkboxes, you can require students to select a minimum, maximum, or exact number of answers. This is useful when, say, the question says pick 3, but students don’t read the instructions. The answer will not record until students meet the requirements. You can even add a custom message.
Short answers can have response validations for number, text, length, and regular expressions. There are several options for numbers: greater than, less than, between, whole number, etc. The text option can require the answer to contain or not contain certain words. You can also use this in other Forms to validate e-mail addresses and URLs. Length allows you to set maximum and minimum character counts. The regular expressions option looks for patterns in the answer. There are a lot of options for this, and it’s complicated, so check out this resource from Google if you want to look into this more.
Paragraph answers are similar to Short Answer, but it’s options are limited to length and regular expressions.
5. Score written responses in the Responses section

Forms quiz mode will grade most of the questions you’ll put in there: multiple choice, checkboxes, dropdown, some short answer, and so on. What about written responses like paragraph answers? You can score that right in your Form document. Click on the Responses tab and you’ll see all the Form data. You can click on either Question or Individual to view responses by question or individual. Scroll through and score any questions that need scoring. You can also edit anything Forms scored and give partial credit. Maybe a student didn’t quite get one of the short answers you put as a correct answer, but they were close and you want to give them partial credit.
There you have it. A few steps to get you started with using quizzes in Google Forms. Good luck, and let me know in the comments section other useful tips you’ve come across.
